
One of the most important responsibilities you’ll have as a pet parent is to clean your dog’s ears regularly. Skipping this routine will increase your dog’s chances of developing several ear problems, such as ear mites and ear infections. Some dogs even succumb to the effects of chronic yeast infections or other chronic ear infections.
But because your dog’s ears are different from humans’, you need to be very careful about how you clean them. Not knowing how to properly clean your dog’s ears or not using the appropriate ear cleaning solution will eventually take a toll on your dog’s health.
If you have never cleaned your pup’s ears in the past, this article is for you.
How Can You Properly Clean Your Dog’s Ears?
Contrary to popular belief, cleaning your dog’s ears doesn’t have to be stressful or time-consuming. We have broken down the ear cleaning process into ten simple steps, so you can finally remove those ear wax and ensure that your dog has healthy ears!
Step 1: Prepare Your Supplies
To ensure that the ear cleaning process goes smoothly, prepare all of your supplies beforehand. This means grabbing a vet-approved ear cleaner and cotton ball. If your vet recommended other medications for your dog’s ears, make sure to prepare those, as well.

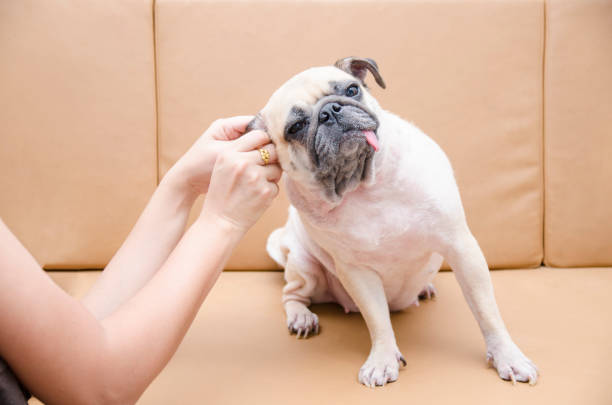
Step 2: Hold The Ear Flap
Gently grasp your dog’s ear flap and pull upward. This will expose the inside of your dog’s ear, as well as their ear canal.
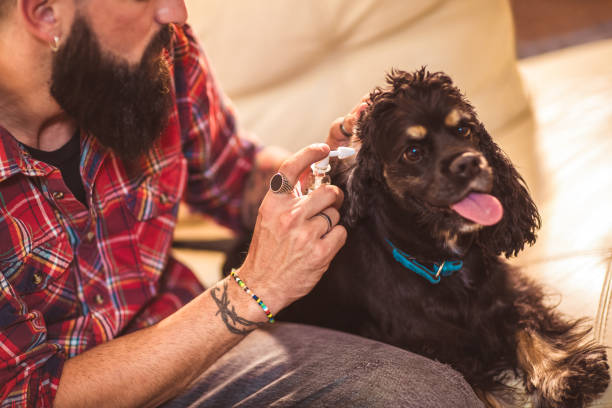
Step 3: Apply The Ear Cleaner
This step can be done in two different ways. One, you can apply the liquid ear cleaner directly into your dog’s ear canal. This method will require you to insert the tip of the ear cleaner into the ear canal and then squeeze the bottle. Make sure not to push the bottle too forward, as this can damage your dog’s ear drum.
If your dog doesn’t like the feeling of a liquid ear cleaning solution going into their ears, try the second method. For this method, you need to apply a generous amount of the ear cleaner into a cotton ball. Gently wipe your dog’s ear flap with the cotton ball. Ensure that the size of the cotton ball is large enough so that if you accidentally let go of it, it won’t slide down into your dog’s ear canal.
Step 4: Gently Massage The Base Of The Ear
Regardless of the method you choose in cleaning your pup’s ears, don’t forget to gently massage the base of their ears. The key here is to remain gentle as massaging your dog’s ears too hard can hurt their ear canals and cause pain.
Step 5: Let Your Dog Shake Their Head
Due to the feeling of ear cleaners in their ear canals, your dog might want to shake their head. This behavior isn’t only normal; this is actually a very good thing. When your dog shakes their head, the ear cleanser can wash farther into their ear canals, allowing the product to break up more ear wax and debris. Head shaking can also bring more debris into the surface and make it easier for you to clean dog ears.
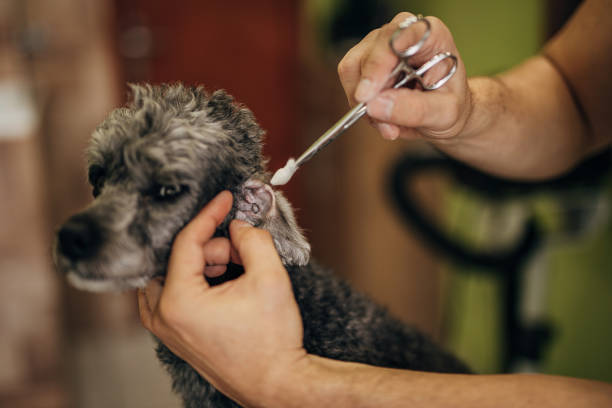
Step 6: Wipe Out The Ear
Once the ear cleaner is thoroughly massaged through your dog’s ear canal, it’s time to wipe out the broken-down ear wax and debris. If there is still a cotton ball in your dog’s ear, remove it now.

Gently wipe the ear canal using gauze or your finger. Insert a gauze or your finger into the ear canal, wipe it in a circular motion, and pull the gauze or finger to remove the debris.
Step 7: Repeat If Necessary
Depending on the breed of your dog, you might need to repeat steps three to six several times to achieve clean and healthy ears. Floppy-eared dogs, for example, will require more time and effort due to the size of the ears. Bigger ears mean more wax, and debris can accumulate for a shorter period.

Step 8: Wipe The Ear Flap
The inner surface of your dog’s ear flap can also get dirty, so make sure to clean this area, as well. This is a must to prevent ear infections in dogs.
After cleaning dogs’ ear canals, wet a cotton ball with the ear cleaner and use it to clean your dog’s ear flap. You can also use dog ear wipes for this step. Don’t push the cotton ball or wipes too hard, as this can irritate your dog’s skin.
Step 9: Double-Check Your Work
Take the time to double-check your work to ensure that cotton balls and gauze pads aren’t left on your dog’s ears. Having these things stuck on their ears can be very uncomfortable and cause an ear infection.
Step 10: Apply Medications (If There Are Any)
If your vet recommended medications to ensure the health of your dog’s ears, apply them now. Follow the instructions on the label and reach out to your vet if you have any questions about your dog’s medications.
Note: The ear cleaning process should be a fun and positive experience for your dog. Always praise your dog whenever they behave properly as you clean their ears and end the session by giving them some treats. Praises and treats will help calm your dog.
What Are Some Of The Do’s And Don’ts When Cleaning Your Dog’s Ears?
Now that you know the basic steps to follow when cleaning your dog’s ears, it’s time to consider some do’s and don’ts. This information will ensure that your dog’s ears are free from any bacterial infections, and you can easily clean them regularly.

Dos:
- Only use an ear cleaner designed for dogs.
- Reward your dog regularly during and after the cleaning. Not all dogs like having someone touch their ears, so remain patient and allow your dog to adjust as you clean their ears. Aim to make the experience relaxing for your fur baby – like they have their own spa session at home.
- Remain gentle when cleaning dogs’ ears. Infected or dirty ears can be quite painful. Not to mention that your dog’s eardrum is also very fragile.
- Consult your vet to know how often you should clean your dog’s ears. The answer can vary due to many factors, so avoid making decisions on your own.
Don’ts:
- Never use water to clean your dog’s ears, as this will only cause more debris to get trapped inside. Unlike ear cleaners, water doesn’t break down ear wax and other debris in your dog’s ears.
- Never pluck your dog’s ear hair. Plucking is very painful for your furry friends, especially if they have highly sensitive skin.
How Often Should You Clean Your Dog’s Ears?
The answer to this question depends on several factors, namely the breed, daily activities, and health condition of your furry friends. Dogs with floppy ears, such as basset hounds and Cocker Spaniels, are at higher risk of developing ear infections than other breeds, which is why they would require more frequent ear cleanings. The same remains true for dogs who love to swim and hyperactive dogs who love to play in the mud all the time.

Some dogs hardly need to get their ears cleaned. Remember that over-cleaning can cause irritation and ear infection. So if you’re not sure how often you should clean your dog’s ears, reach out to a vet immediately.
What Are The Most Common Signs Of Ear Infections?
Cleaning your dog’s ears is a task most dog owners can easily do at home. However, if you notice signs of ear infections, you need to take your dog to the vet right away. Ear infections require immediate solutions to prevent the problem from worsening.
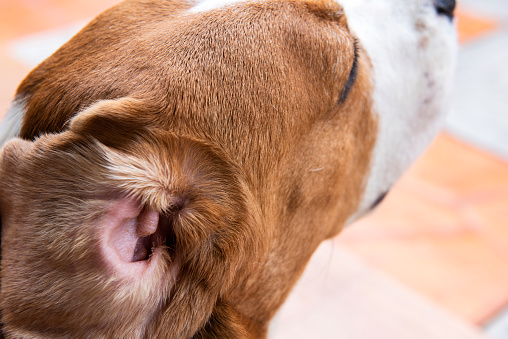
Generally, inflammation, redness, a strange smell, and signs of pain when you massage your dog around the ears are signs of ear infections. Some dogs might even experience severe hair loss around the ears due to chronic ear infections.
What Products Should You Use When You Clean Dog Ears?
You can clean your dog’s ears at home using a dog ear cleaning solution recommended by the vet, cotton balls (never use Q-tips or cotton swabs as these can damage your dog’s ear canal), and a few treats to make the ear cleaning process more appealing to your fur baby.
Although it can be tempting to make and use a DIY ear cleaner, don’t. Homemade ear cleaning solutions can do more harm than good to your dog’s ears, so make sure to stick to vet-approved ear cleaners.
Moreover, your vet can help you determine the best dog ear cleanser suitable to your dog’s needs: some dog ear cleaning solutions work better for breaking down wax, while others can prevent the growth of bacteria and fungi. Your vet will also discourage you from using ear cleaners that contain alcohol, vinegar, and hydrogen peroxide, as these ingredients can irritate your pooch’s ears.
What Should You Look For In A Dog Ear Cleaner?
Aside from following the right steps in cleaning your dog’s ears, it’s also crucial to use the right ear cleaner. In fact, the ear cleaner you’ll use can significantly affect the condition of your dog’s ears. Use the wrong ear cleaner once, and your dog will likely suffer from an ear infection.
When choosing an ear cleaner for your fur baby, consider the following:
Use A Vet-Approved Solution
The internet is a goldmine of information about homemade ear cleaning solutions. And while these are cheap, it’s still best to use a vet-approved ear cleaner to ensure your dog’s safety. Using a DIY dog ear cleaning solution can be harmful or irritating to your dog’s skin.
Choose Liquid Ear Cleaners
A liquid ear cleaning solution is more effective than wipes because it can easily reach dogs’ ear canals. Because your furry friend’s ear canal is long and narrow, wipes aren’t able to reach down into the canal and thoroughly clean it.
Additionally, liquid ear cleaners work better at dislodging gunk in your dog’s ears. This happens because when you squirt the cleaning solution into the ear canal and let your dog shake it out, the force of their head shaking can remove all of the debris, even those stuck in their inner ear.
Check The Label
Price shouldn’t be your sole deciding factor when choosing an ear cleaning solution; you should pay more attention to the ingredients it contains. Always check the label before buying any ear cleaners, as some ingredients might be harmful to your dog.
For one, it’s best to avoid dog ear cleaning solutions that contain tea tree oil as this can trigger allergic reactions and irritations. This will likely happen to your dog if they have sensitive ears.
Opt to invest in a cleaning solution that uses the following ingredients:
- Ketoconazole works as an antifungal treatment.
- Salicylic acid and lactic acid can prevent mild bacterial infections.
- Hydrocortisone combats itchiness.
3 Best Dog Ear Cleaning Solutions
Using the right ear cleaning solution is key to making sure that your fur baby has healthy ears. The right ear cleaner will also make your life easier as a pet owner as you can easily remove debris and wax from your dog’s ears.
In this section, we’ll list down three of the best dog ear cleaning solutions and why we highly recommend these products. Use the information below to help you narrow down your option, so you can clean your dog’s ears with the best ear cleaner!
Vetoquinol Ear Cleansing Solution
The Vetoquinol Ear Cleansing Solution contains aloe to soothe and soften your dog’s skin. Aside from incorporating this cleaning solution into your dog’s routine cleaning, you can also use this to alleviate itching and irritation caused by the dirt inside your dog’s ears.
Pet MD Otic Clean Dog Ear Cleaning Solution
Unlike other ear cleaners, the Pet MD Otic Clean Dog Ear Cleaning Solution is specifically formulated to deodorize and balance the pH levels in your dog’s ears. This ear cleaner can effectively remove moisture, oil, wax, and other unwanted debris in your dog’s ears. And the best part? It comes in a sweet pea vanilla scent that makes your dog feel fresh.
Doggie Dailies Pet Ear Cleaner
The Doggie Dailies Pet Ear Cleaner contains tea tree oil, witch hazel, and aloe vera to clean your dog’s ears and leave them smelling fresh. It’s designed with a mild scent to prevent irritation among dogs and pet owners.
Takeaway Points
To keep your dog healthy, you need to regularly clean their ears. Frequent ear cleanings should be part of their routine to prevent ear infections.
If you don’t have any idea how to properly clean your dog’s ears or are still clueless about which ear cleaner to use, consider this article as your guide – everything you need to know about dog ear cleaning is already presented here!